PowerApps Interface Walkthrough
The PowerApps interface walkthrough is your essential starting point when learning to build low-code applications in Microsoft Power Platform. PowerApps provides a powerful yet user-friendly environment that enables users to create business apps without requiring extensive coding experience.
This PowerApps interface walkthrough will help you explore each component of the design studio, so you can confidently build, customize, and publish apps.
🖥️ PowerApps Interface Walkthrough – The Complete Beginner’s Guide
📚 Table of Contents
- Accessing the PowerApps Interface
- Exploring the PowerApps Studio
3.1 Tree View
3.2 Canvas Workspace
3.3 Insert Panel
3.4 Properties Panel
3.5 Formula Bar
3.6 Data Panel
3.7 Media and Variables - Previewing, Testing, and Debugging
- Saving, Publishing, and Sharing Your App
- Conclusion
- Keyword Optimization Summary
2. 🔐 Accessing the PowerApps Interface
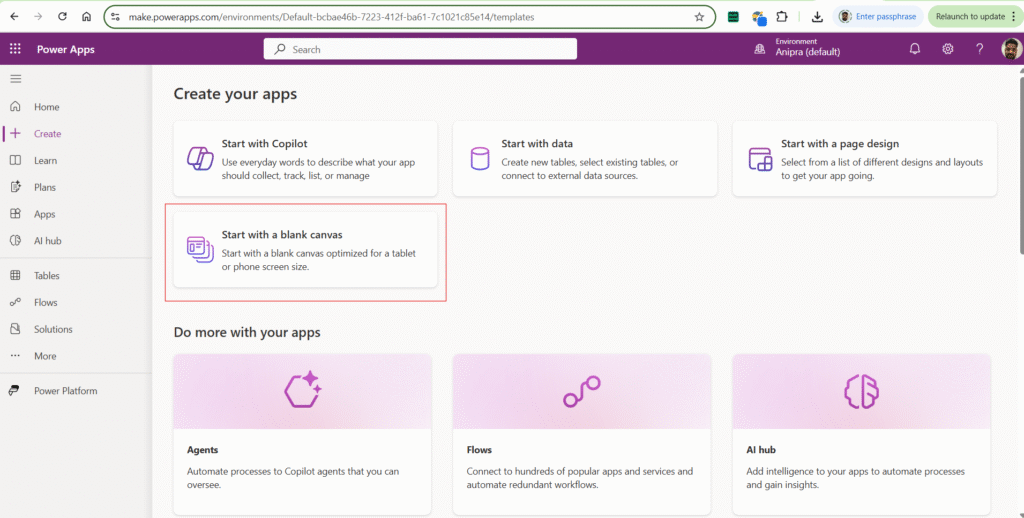
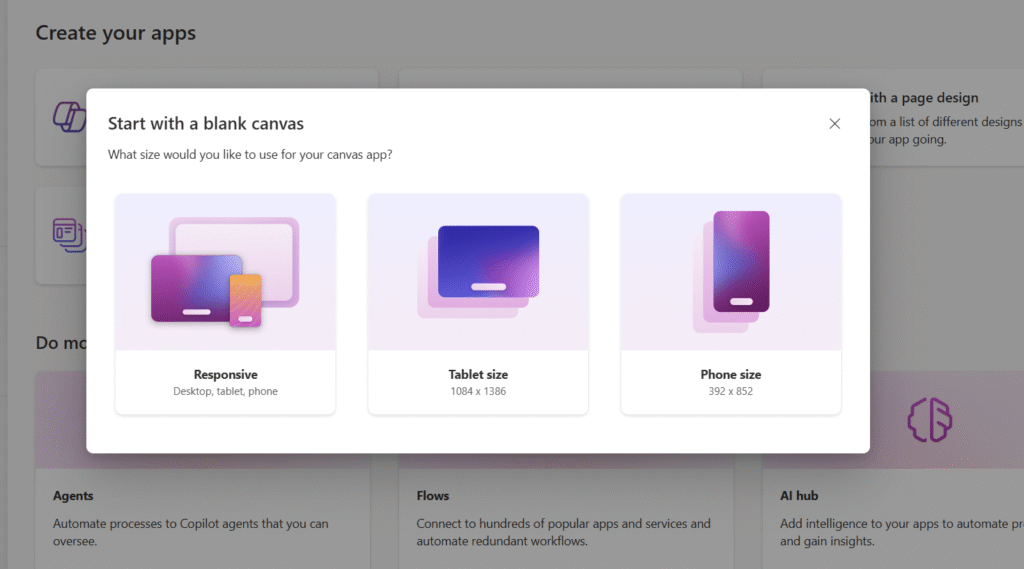
To begin your journey, visit https://make.powerapps.com and sign in with your Microsoft 365 account. From here, you can start a new app using templates or create from a blank canvas.
Once you select “Canvas App from Blank”, you’re redirected to the PowerApps Studio, the visual development environment that’s central to this PowerApps interface walkthrough.
3. 🧩 Exploring the PowerApps Studio
The PowerApps interface is made up of multiple panels, each designed to assist in building your app visually and logically. Let’s explore them one by one:
3.1 Tree View
- Located on the left panel.
- Shows a hierarchical view of all app screens, components, and controls.
- Great for organizing and navigating between app elements.
- Enables quick selection and renaming of components.
In this PowerApps interface walkthrough, the Tree View is essential for managing app structure efficiently.
3.2 Canvas Workspace
- The central area of the PowerApps interface.
- Allows drag-and-drop functionality to build your app layout.
- Displays screens one at a time for mobile, tablet, or responsive design.
- Where you design and position labels, buttons, forms, and galleries.
This visual workspace is where your creativity comes to life in PowerApps.
3.3 Insert Panel
- Accessed from the top navigation bar or the “+” icon on the left.
- Lets you add controls such as:
- Text inputs, buttons, sliders
- Galleries and forms
- Media files like images, videos, audio
- Drag and drop to place on your canvas.
This is one of the most interactive sections in the PowerApps interface walkthrough, essential for designing app interactivity.
3.4 Properties Panel
- Appears on the right-hand side when an element is selected.
- Used to customize selected controls:
- Text, size, padding, border
- Color, visibility, alignment
- Simplifies UI customization without writing formulas.
The Properties Panel ensures users can control how their app looks and behaves.
3.5 Formula Bar
- Located above the canvas.
- Works like Excel’s formula bar.
- Used to add logic using Power FX, a powerful expression language.
- Example:
Navigate(Screen2, ScreenTransition.Fade)
No PowerApps interface walkthrough is complete without highlighting the power of formulas to drive behavior and automation.
3.6 Data Panel
- Found in the left navigation under the database icon.
- Lets you connect data sources to your app:
- SharePoint
- Excel
- SQL Server
- Dataverse
- You can add or remove data connections easily.
Data is at the heart of every business app. In this PowerApps interface walkthrough, the Data Panel is your gateway to integrating real-time business information.
3.7 Media and Variables
- Media Panel: Manages imported images, audio, videos.
- Variables Section (View → Variables):
- View global, context, and collections
- Monitor how data flows through your app
Understanding variables is key to mastering more dynamic behavior in your apps.
4. ▶️ Previewing, Testing, and Debugging
- Use the Play icon (▶) to preview your app in real time.
- The App Checker (top-right) helps you:
- Identify errors
- Optimize performance
- Use the Monitor Tool to debug flows and track events.
This ensures your app works as expected before deployment.
5. 💾 Saving, Publishing, and Sharing Your App
- Click File → Save to store your work in the cloud.
- Select Publish → Publish this version to make the app live.
- Use the Share button to assign permissions to users or teams.
These steps are essential after you finish building in the PowerApps interface.
6. 📝 Conclusion
This detailed PowerApps interface walkthrough provides everything you need to begin using the PowerApps Studio with confidence. From the tree view to the formula bar, each part of the interface is designed to empower citizen developers and IT professionals to build scalable, functional apps.
By mastering the PowerApps interface, you unlock the full potential of Microsoft’s low-code platform and set the stage for advanced business app development.